Android渐变色处理
大纲
1.xml 实现背景渐变 和 边框渐变
2.Drawable 实现背景渐变 和 边框渐变
3.自定义View实现渐变处理
xml实现渐变
背景渐变
使用shape 在xml布局中定义
<?xml version="1.0" encoding="utf-8"?>
<shape xmlns:android="http://schemas.android.com/apk/res/android"
       android:shape="rectangle">
    <size android:width="100dp"
          android:height="100dp"
    />
    <gradient
        android:startColor="@android:color/holo_blue_light"
        android:endColor="@android:color/holo_red_light"
    />

</shape>
gradient标签下可以添加一些渐变控制,包含的属性如下表:
| 属性 | 描述 | 取值 |
|---|---|---|
| type | 类型 | linear(默认值, 线性渐变) </br> radial(辐射渐变,圆形) </br> sweep(放射型) |
| startColor | 开始颜色 | |
| endColor | 结束颜色 | |
| centerColor | 渐变中心区域的颜色 | |
| centerX, centerY | 指定渐变中心 | 0 - 1 默认都是0.5表示区域的中心位置 |
| angle | 渐变角度,在type为linear时生效 | 45的倍数 |
| gradientRadius | 渐变半径,在type为radial生效,控制圆形渐变区域半径 | |
| useLevel | 是否启用level, 启用后渐变区域将和设置的level相关,关于此字段我们稍后详解 |
类型
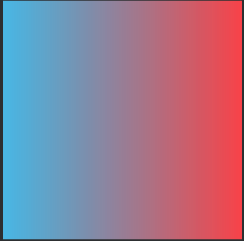
linear:
radial:

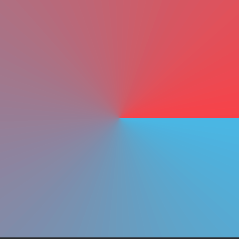
sweep:
useLevel 直译过来 level可以翻译成水平,抹平之类的,很难理解什么意思,我们直接看GradientDrawable的源码对useLevel字段的使用,我们以type 为linear为例:
  private boolean ensureValidRect() {
      ...
       if (gradientColors != null) {
                final RectF r = mRect;
                final float x0, x1, y0, y1;

                if (st.mGradient == LINEAR_GRADIENT) {
                    final float level = st.mUseLevel ? getLevel() / 10000.0f : 1.0f;
                    switch (st.mOrientation) {
                    case TOP_BOTTOM:
                        x0 = r.left;            y0 = r.top;
                        x1 = x0;                y1 = level * r.bottom;
                        break;
                    case TR_BL:
                        x0 = r.right;           y0 = r.top;
                        x1 = level * r.left;    y1 = level * r.bottom;
                        break;
                    case RIGHT_LEFT:
                        x0 = r.right;           y0 = r.top;
                        x1 = level * r.left;    y1 = y0;
                        break;
                    case BR_TL:
                        x0 = r.right;           y0 = r.bottom;
                        x1 = level * r.left;    y1 = level * r.top;
                        break;
                    case BOTTOM_TOP:
                        x0 = r.left;            y0 = r.bottom;
                        x1 = x0;                y1 = level * r.top;
                        break;
                    case BL_TR:
                        x0 = r.left;            y0 = r.bottom;
                        x1 = level * r.right;   y1 = level * r.top;
                        break;
                    case LEFT_RIGHT:
                        x0 = r.left;            y0 = r.top;
                        x1 = level * r.right;   y1 = y0;
                        break;
                    default:/* TL_BR */
                        x0 = r.left;            y0 = r.top;
                        x1 = level * r.right;   y1 = level * r.bottom;
                        break;
                    }

                    mFillPaint.setShader(new LinearGradient(x0, y0, x1, y1,
                            gradientColors, st.mPositions, Shader.TileMode.CLAMP));
                }
  }
可以发现当用户设置useLevel 为true的时候(默认false), 渐变矩形的区域将缩小到getLevel() / 10000算出来的比例,而默认level为0,即如果单独只设置useLevel为true将看不到渐变效果,需要配合setLevel来决定渐变区域。我们来分别看下设置useLevel为true后,level 为 5000 和 8000的时候的样式:
useLevel 为 false:

level为5000 && useLevel为true:

level为8000 && useLevel为true:

边框渐变
直接使用shape并不能实现边框的渐变,我们可以使用折中方案,将2个图层合成一个图,然后两个图之间的空隙可以当做渐变边框。这种方案有个弊端,即背景区域是不透明的纯色、我们可以在xml中使用layer-list标签来做出效果。注意一下应该是系统版本低版本上的图层size并不能生效,我们这里使用top bottom left right 来留出边框的位置。
<layer-list xmlns:android="http://schemas.android.com/apk/res/android"
>
    <item>
        <shape >
            <size android:width="100dp"
                  android:height="100dp"
            />
            <gradient
                    android:startColor="@android:color/holo_blue_light"
                    android:endColor="@android:color/holo_red_light"
            />
        </shape>
    </item>
    <item android:top="2dp" android:bottom="2dp" android:right="2dp" android:left="2dp">
        <shape >
            <solid android:color="@android:color/white"/>
        </shape>
    </item>

</layer-list>
实际效果:
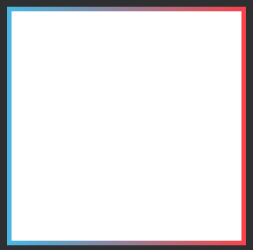
此方法有一个问题就是并不能支持中间区域带透明度的问题,如果需要这个效果我们可以通过自定义Drawable 或者自定义View来实现。
使用Drawable实现渐变
API 16以及16以上系统提供了GradientDrawable来实现渐变和边框的Drawable, 参数定义同xml中的参数命名,需要特别指出的是对于angle的控制,GradientDrawable使用setOrientation来控制, 我们来看下系统angle转换成Orientation的源码:
      int angle = (int) a.getFloat(R.styleable.GradientDrawableGradient_angle, st.mAngle);
            angle %= 360;

            if (angle % 45 != 0) {
                throw new XmlPullParserException(a.getPositionDescription()
                        + "<gradient> tag requires 'angle' attribute to "
                        + "be a multiple of 45");
            }

            st.mAngle = angle;

            switch (angle) {
                case 0:
                    st.mOrientation = Orientation.LEFT_RIGHT;
                    break;
                case 45:
                    st.mOrientation = Orientation.BL_TR;
                    break;
                case 90:
                    st.mOrientation = Orientation.BOTTOM_TOP;
                    break;
                case 135:
                    st.mOrientation = Orientation.BR_TL;
                    break;
                case 180:
                    st.mOrientation = Orientation.RIGHT_LEFT;
                    break;
                case 225:
                    st.mOrientation = Orientation.TR_BL;
                    break;
                case 270:
                    st.mOrientation = Orientation.TOP_BOTTOM;
                    break;
                case 315:
                    st.mOrientation = Orientation.TL_BR;
                    break;
            }
很清楚的能看到我们为什么说只支持是45的倍数。 GradientDrawable并不支持边框渐变, 我们依然可以使用2个图层的思路来解决边框渐变的控制,LayerDrawable 2个图层实现边框渐变 。
     LayerDrawable layerDrawable = new LayerDrawable(new Drawable[]{bgDrawable, drawable});
        layerDrawable.setLayerInset(1, borderWidth, borderWidth, borderWidth, borderWidth);
我们需要通过setLayerInset方法来控制图层图层直接的偏移来留出边框的位置。
自定义View实现渐变
配置画笔渐变,这里我们说Linear类型的渐变
    private void updateGradientPaint(Paint paint, RectF r, GradientStat stat) {
        float x0, x1, y0, y1;
        int angle = stat.angle % 360;
        if (angle % 45 != 0) {
           throw new RuntimeException("");
        }
        if (angle == 0) {
            x0 = r.left;
            y0 = r.top;
            x1 = r.right;
            y1 = y0;
        } else if (angle == 45) {
            x0 = r.left;
            y0 = r.bottom;
            x1 = r.right;
            y1 = r.top;
        } else if (angle == 90) {
            x0 = r.left;
            y0 = r.bottom;
            x1 = x0;
            y1 = r.top;
        } else if (angle == 135) {
            x0 = r.right;
            y0 = r.bottom;
            x1 = r.left;
            y1 = r.top;
        } else if (angle == 180) {
            x0 = r.right;
            y0 = r.top;
            x1 = r.left;
            y1 = y0;
        } else if (angle == 225) {
            x0 = r.right;
            y0 = r.top;
            x1 = r.left;
            y1 = r.bottom;
        } else if (angle == 270) {
            x0 = r.left;
            y0 = r.top;
            x1 = x0;
            y1 = r.bottom;
        } else {
            x0 = r.left;
            y0 = r.top;
            x1 = r.right;
            y1 = r.bottom;
        }
        paint.setShader(new LinearGradient(x0, y0, x1, y1,
                stat.colors, null, Shader.TileMode.CLAMP));
    }
渐变边框,边框矩形区域要取边框间距的中间位置来绘制, 例如:
  // width 表示表框宽度
  float offset = width / 2f;
  RectF bolderRect = new RectF();
  bolderRect.set(offset, offset, getMeasuredWidth() - offset,
                getMeasuredHeight() - offset);
欢迎关注我的微信公众号
璐豪笔记